
![]() Overlay Rotation Tool with updated spot directing menu
Overlay Rotation Tool with updated spot directing menu ![]()
The spot directing menu in the previewer has a refreshed layout!
- “Modes” are on the left side
- Layering tools are now in “Move” mode
- Characters support Move & Scale modes
- “Flip Char” has been moved from the right side menu to the left side menu
Overlays can now be adjusted with a suite of new tools and modes! You can now do the following with overlays after clicking on the “Change Overlay” button:
- Rotate mode
- drag to adjust rotation value
- reset & adjust rotation in 90 degree increments
- Scale mode
- (same as before) drag to adjust scale
- flip across X & Y axes
- Anchoring mode
- drag to adjust the overlay around the anchor point (black and white square)
- adjust the anchor point in 0.1 increments and between fixed positions
- Opacity mode
- drag to adjust opacity between 0 and 1
- reset & adjust opacity in 0.1 increments
- Move mode
- (same as before) drag to adjust position
- layering buttons relocated here
- Rotate mode
While dragging with these tools, other elements of the HUD will dim to reveal more of your scene

![]() Shorter Overlay Command - ovl
Shorter Overlay Command - ovl ![]()
You can now use “@ovl” where you would’ve used “@overlay” (the same applies with “&”)
You can also use it with AND like the following
@ovl INT. OFFICE SUPPLY CLOSET BOXES shifts to 100 100 AND ovl INT. OFFICE SUPPLY CLOSET BOXES scales to 2.0 2.0
![]() Variables: SET command
Variables: SET command ![]()
String variables can be used with SET command! These can be displayed in dialogue with replaceables. For example:
set my_favorite tuna fishNARRHow is the [my_favorite] on toast?
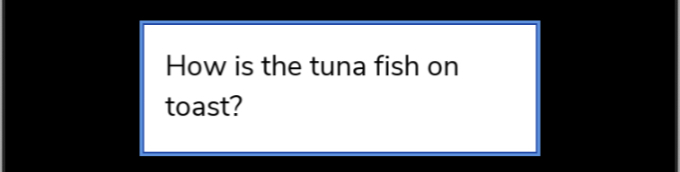
Explanation: the string “tuna fish” is stored into the variable “my_favorite” and you can use brackets around that variable name to have it appear in your dialogue
![]() Outfit Editor: Generic Female → Female plus outfit convertor
Outfit Editor: Generic Female → Female plus outfit convertor ![]()
To assist with Female plus branching, you can now create Female plus outfits from a saved Generic Female’s outfit by creating a new Female plus outfit name and clicking the “Convert to Plus” button.

A new Female plus outfit will be generated and saved with clothing asset that is usable by both Generic Female and Female plus characters.
A pop-up will notify you if there is no available matching Female plus clothing asset.

![]() Outfit Editor: Filtering shared clothing
Outfit Editor: Filtering shared clothing ![]()
With the outfit editor, you can now filter and see what clothes are shared with the current character you’re editing.
The red box shows the current character type you are dressing. The blue box allows you to filter which clothes are shared with another character type.

![]() Looping Backgrounds via Donacode
Looping Backgrounds via Donacode ![]()
You can now have any background loop on screen via Donacode! All you do is specify a loop speed as the last part of your background (after any overlays). Examples:
Without overlay
EXT. ABBEY GARDEN - DAY with loop speed 320
With un-moving overlay
EXT. ABBEY GARDEN - DAY with BANISTER SIMPLE with loop speed 320
With negative loop speed and un-moving overlay
EXT. ABBEY GARDEN - DAY with BANISTER SIMPLE with loop speed -1000
With an overlay that moves along with the background
EXT. ABBEY GARDEN - DAY with loop speed 320
&overlay DUST CLOUD WHITE create
&overlay DUST CLOUD WHITE shifts to 480 240
&overlay DUST CLOUD WHITE scales to 1.0 1.0
&overlay DUST CLOUD WHITE rotates 0 anchor point 0.5 0.5
&overlay DUST CLOUD WHITE to layer 1
&overlay DUST CLOUD WHITE opacity 1
&overlay DUST CLOUD WHITE shifts to 480 240 in 0 THEN overlay DUST CLOUD WHITE shifts to -160 240 in 2 loop INFINITE times
Explanation: We have the background moving at 320 units per second; the overlay is moving a distance of 640 units in two seconds to match.
This works with your custom backgrounds as well!
![]() Solid Color Backgrounds via Donacode
Solid Color Backgrounds via Donacode ![]()
If you’d like a solid color background for a scene, you can now do that in Donacode!
Examples
For a pink background:
COL. #ffc0cb
For a cyan background:
COL. #00ffff
We think of “COL.” as “Color-based scene”, similar to “INT.” and “EXT.” for interior and exterior scenes
You can use the color picker in the Transitions section of the Library to pick the hexadecimal code.
![]() Transition previews
Transition previews ![]()
You can now preview transitions in the Transitions section of the “Library” by clicking on the eye icon
