
Script Format
Script Format Overview
Your dialogue will need to follow a strict scripting format:
| CHARACTER NAME (animation)
Dialogue spoken here.
| CHARACTER NAME (animation)
Dialogue spoken.
Any maybe some more dialogue spoken.
If you don’t follow this format, you’re likely to get error messages when you save the script.
Note: While in the Script Editor, pressing “Tab” twice will line up the CHARACTER NAME to where it needs to be, and a single “Tab” will like up where the dialogue needs to be.
Dialogue
The majority of your screenplay is dialogue, which is converted to tappable speech bubbles. Each dialogue bubble is associated with a character.
The following example would create 2 bubbles spoken by Angie.
| ANGIE

This is super cool.
You can read what I am saying!
There are 3 types of dialogue: a speech bubble, a thought bubble, and a narration bubble
To create a speech bubble, place the character’s name before the dialogue, just as you see above:
| ALEX

Dani! Time to do our first example script!

To turn that into something Danielle is thinking, place parenthesis around each line:
| DANIELLE

(Well, whatever, I can just use my phone!)

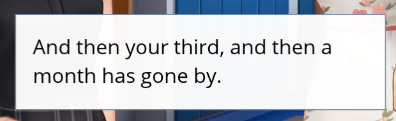
To turn that into something no one is saying, and instead just narration, make the speaker into “NARRATOR”:
| NARRATOR

And then your third, and then a month has gone by.
OR to make it look like someone offscreen is saying that narrator line, add their name next to it:
| NARRATOR (ANGIE)

This is super cool.
You can read what I am saying off screen!
IMPORTANT
|
Backgrounds
Art Catalog
The first step in writing your script is to start with a place. Browse our Art Catalog for ideas.
- Search for a background in the Art Catalog.
- When you’ve found one you like, add its title to the start of your script. In the Art Catalog, the title is beneath each backdrop, and formatted: “INT. PLACE NAME - DAY”
Example:
EXT. MOVIE THEATER - NIGHT
INT. DORM ROOM - DAY
Changing Backgrounds
To change your background, place the name of the background you would like in an empty line of your script. Note that:
This will remove any characters that were on screen
- The zoom will remain at the same level it was previously
- The background will default to zone 1 (the far left square)
IMPORTANT
|
Adding Overlays
Sometimes you may want an item in the foreground of a background, maybe a table, tree, car, or a desk, for example. You can find the usable Overlays in the Art Catalog under the “Overlay” tab. Take the name of the overlay and add it to the background as “with OVERLAY”. For example:
EXT. BRUNSWICK HOME - DAY with BOXES
INT. ANGIE BEDROOM - DAY with DESK SCHOOL
Example:
INT. DORM ROOM - DAY with DESK BEDROOM

| SARAH
Is this my room?
It is rather small...


| ANGIE
Hey girl, let’s get a latte.


| SARAH
OK!


EXT. EPIBUCKS - NIGHT

| SARAH
I’m so hyper!
Note: There are LOTS of things you can do with overlays. Read about it here.
CREATIVE NOTE If you already have a sense of what your story will be about, it’s very likely that you’ll be able to find the perfect background for your scenes’ needs in the Art Catalog. It can also be fun to let browsing the Art Catalog inspire your story. You can use the Art Catalog as a great jumping off point for more creative ideas for your story. |
Comments
To include a comment in the script that should be ignored by the computer, start the line with a pound (#) sign. You can use comments to give you a preliminary idea of stage directions and how a scene will move, or to leave yourself little notes and reminders.
Example:
#You’re doing homework at your desk. Sarah walks up to you.

| SARAH
Hey! Want to get a puppy?

#NOTE TO SELF: Maybe make this next line a “choice” moment?

| YOU
I love puppies!
Script Templates
Using Script Templates
Script templates are pre-created scene set-ups or tools that you can easily drop into your script, to make some complicated directing easier.
Right now they include templates for camera angles, crowds, a simple outfit choice, a simple narrative choice, and an Avatar Creator, so they can create their own characters in your story. Most of these templates are in our Ink Style, though you can find many in the Classic style as well.
To insert a Template into your script, first place your cursor on the line where you would like the Template Code to go. Below I’ve selected line 14:

Next, find the template you would like to use in the right hand side bar catalog. You can preview what a template looks like by clicking on the EYE to the left of it:

When you click on a template, you will get a prompt asking you which characters you would like it to include. You may change any character in that template into one already existing in your script (of the same gender) or you can keep the default ones there. This will automatically create those characters in your script, which can be useful for random crowd characters.
IMPORTANT For the camera angles, you MUST select a character. You should change the RIGHTCHARACTER to whichever character you would like on the right side of the shot, and the LEFTCHARACTER to whichever character you would like on the left. |
Once you’ve selected your characters, the template will be inserted into your script and any default characters you selected to include will be created when you next save. It will be inserted closed. Note in the example below how the line numbers jump from 10 to 67. This is because 57 additional lines of code are in that template, but it is closed, so you don’t need to worry about it:

You can click on the {<-->} to expand the code and edit it. But be careful, a number of these templates include advanced code. Make sure you read our Advanced Directing Guide before proceeding:

CREATIVE NOTE Templates are a terrific way to begin playing with more advanced code and get used to how it works. They are also a great way to get more visual diversity and excitement into your story! We’ve seen that the top performing stories on Episode are 4x more likely to use templates and, when they do, use them 3x as often! |